Email templates help you send emails quickly and keep your communication consistent. Let's see how you can choose, customize, and manage email templates for future use.
1) Choosing From Default Email Templates
While sending an email to a lead, you will have an option called “Email Template”. In this dropdown, you will see the list of default templates as shown below:

Depending on the reason you are writing the email, you can select the relevant template. As you see above, the text for the email subject & body will be automatically filled up.
You can also modify this pre-filled text as needed or leave it unchanged if it suits your needs. Once done, click “Send Email” to send the email.
2) Using Template Variables for Personalization
In the email templates you select, you will see some variables such as {{company.name}}, {{contact.name}} etc. as highlighted below:
Variables are just placeholders. When you send the email, the system will automatically replace these variables with the actual data.
For example, If your template says, “Hello,{{contact.name}},” and you’re emailing a person named John, the system will replace{{contact.name}}with “John,” so the email says: “Hello, John.”
Here’s the list of different variables and what they mean:
You can add more variables like these by going to the three dots (...) icon and clicking on "Add Variable" as shown below:
Utilize any of these variables in any of your templates to personalize your emails and avoid the hassle of manually typing these details every time you send an email.
3) Template Configurations
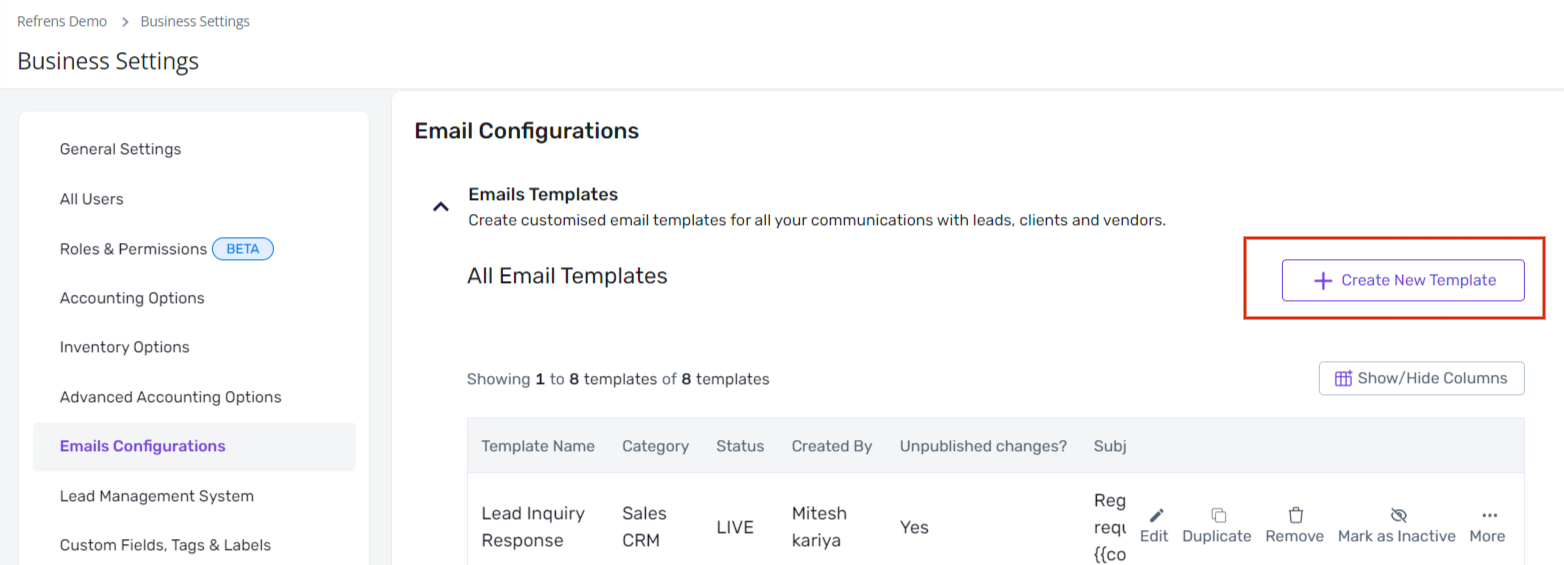
If you wish to edit, delete, remove, or deactivate a template, you can do so from Business Settings > Email Configuration > Email Templates. Here you will see the list of all the email templates as highlighted below:
3.1) Editing Default Templates
If you wish to edit a default template, just click on the “Edit” icon as shown below:
This will redirect you to the template editor page like this:
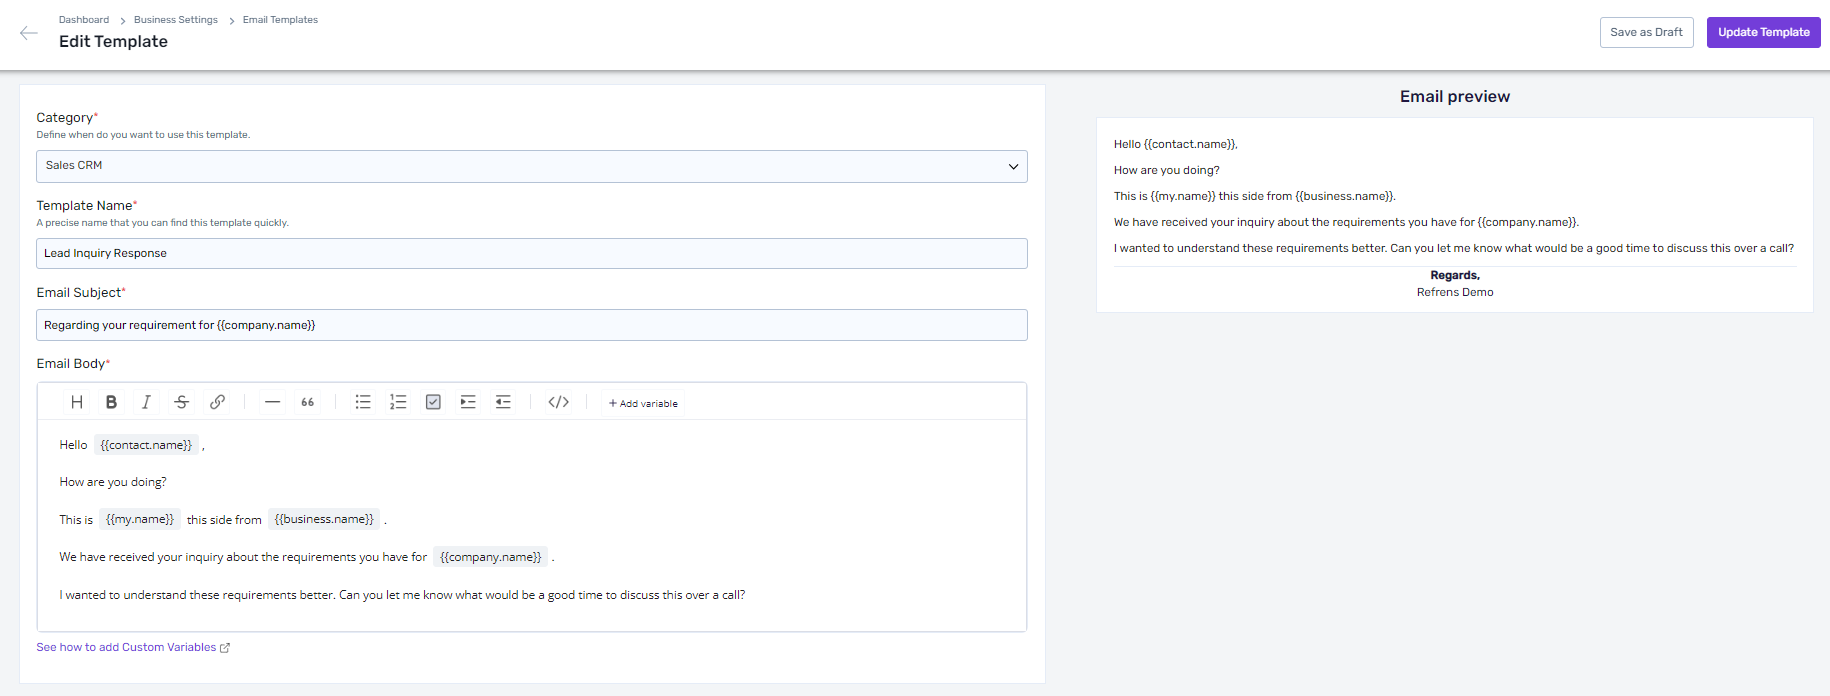
Here, you can edit the template name, email subject, email body, etc. as per your requirements.
You can also use any of the template variables (as discussed earlier) as per your needs by clicking on the "Add Variable" icon:
Variables help you save time by automatically filling in details like the lead's name, company, your name, and business name, so you don’t have to retype them with each email you send.
3.2) Duplicating Email Templates
If you want to create a new template, you can either -
A) Duplicate an existing template, make edits to it, and publish it to create a new template OR
B) Create a completely new template from scratch (go to point no. 4 to see how).
Duplicate any template from here:
3.3) Deleting Templates or Making Them Inactive
If you no longer wish to use a template you can either delete it or make it inactive. (Inactive templates would no longer be visible in the “Email Templates” dropdown. You can activate them later as well.)
4) Creating New Templates
If you want to create new templates, you can do that as well. Just go to "Create New Template" under email template configurations:
This will redirect you to the template creation page:

For example, I want to create a template that I want to use to send an inquiry confirmation email to my leads. Let's see how I can do this:
As you see, I have used some variables like {{business.name}}, {{my.name}}, etc. to personalize my templates as we discussed earlier in this article.
Once you are done with the content, you can also see the email preview to check how your email will look. When satisfied, click on "Publish Template" to start using this template!
5) Best Practices For Using Email Templates
- Personalization: Always use variables to personalize your emails. This makes your communication more engaging and less generic.
- Regular Updates: Review and update your templates regularly to ensure they stay relevant and reflect any changes in your messaging strategy.
- Template Testing: Before using a new template, test it by sending emails to yourself or a colleague to ensure all variables are working correctly and the email looks as intended.
That's it! Have questions or need help? reach out to us at care@refrens.com or on chat support for quick assistance!