What is a Refrens Business Profile?
Refrens business profile is like a website where you can maintain your online presence. With a Refrens profile, you can showcase your projects, services, client reviews, and other information you would like to showcase to your potential clients.
Take a look at some of the business profiles created by Refrens users:
- Friction Studio: Shopify Agency
- RadioSparx: Commercial Background Music Service
- Ambilimon: Digital Marketing Consultant
Why a Refrens Business Profile is better than a Website?
Cost-effectiveness: Creating a website could cost you anywhere from 20k to 100k+ depending on the complexity of the website. On the other hand, Refrens Profile is completely free.
No technical knowledge required: For building a website, you might need the help of a developer. On the other hand, creating a Refrens Profile doesn’t require technical knowledge!
Quick setup: Setting up your business profile can take just 1 hour while creating a website can take at least a couple of weeks.
Quick to update: Updating a Refrens profile just takes minutes, while updating a website requires a lot of time and back-and-forth with your developer.
Insightful analytics: A business profile gives you valuable insights into how many people viewed your profile, projects, services, and more.
Better visibility: Unlike a website, your Refrens Profile will also be visible to thousands of businesses on Refrens Feed & Refrens Marketplace. This gives you more chances of attracting more leads.
How to create a Business Profile?
Creating a Refrens Business Profile is super easy. Let's see how:
Step 1: Go to Profile > Edit Profile from the sidebar

Step 2: Add a cover image, logo, and tagline

Start by adding your business name & logo by clicking on the 'edit' icon.
While adding a cover image is not mandatory, we do recommend adding it to improve the look of your business profile.
Step 3: Update Profile Stats
Profile stats help you showcase important details about your business such as -
No. of clients you have served to date
No. of team members
No. of projects completed to date
No. of year you have been in business
Average ratings
This helps you build trust for the potential leads visiting your profile.
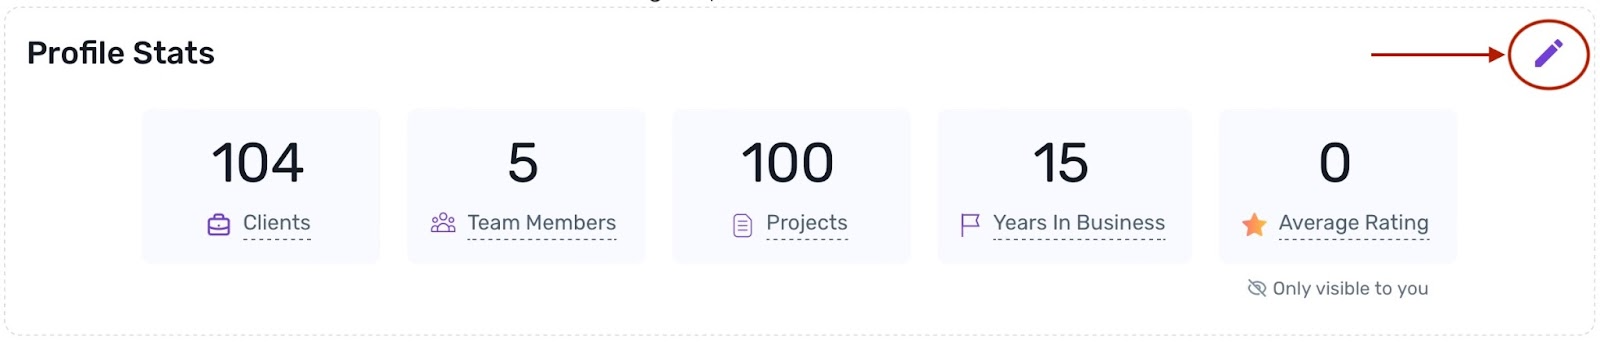
To edit the stats, just click on the icon highlighted above.
You will see the following pop-up:

Stats Label: If you wish to change the label names, you can do so from here.
Value: Here you can add the no. of clients/team members, projects, etc.
Autoupdates: If you want to auto-update your no. of clients/projects based on your invoices, you can do that as well by marketing the checkbox.
Show on Profile: This helps you choose which stats to display/hide from your public profile.
Step 4: Add Products/Services
4.1) Click on “Add Service”
Start by clicking on the "Add Service" icon highlighted below.
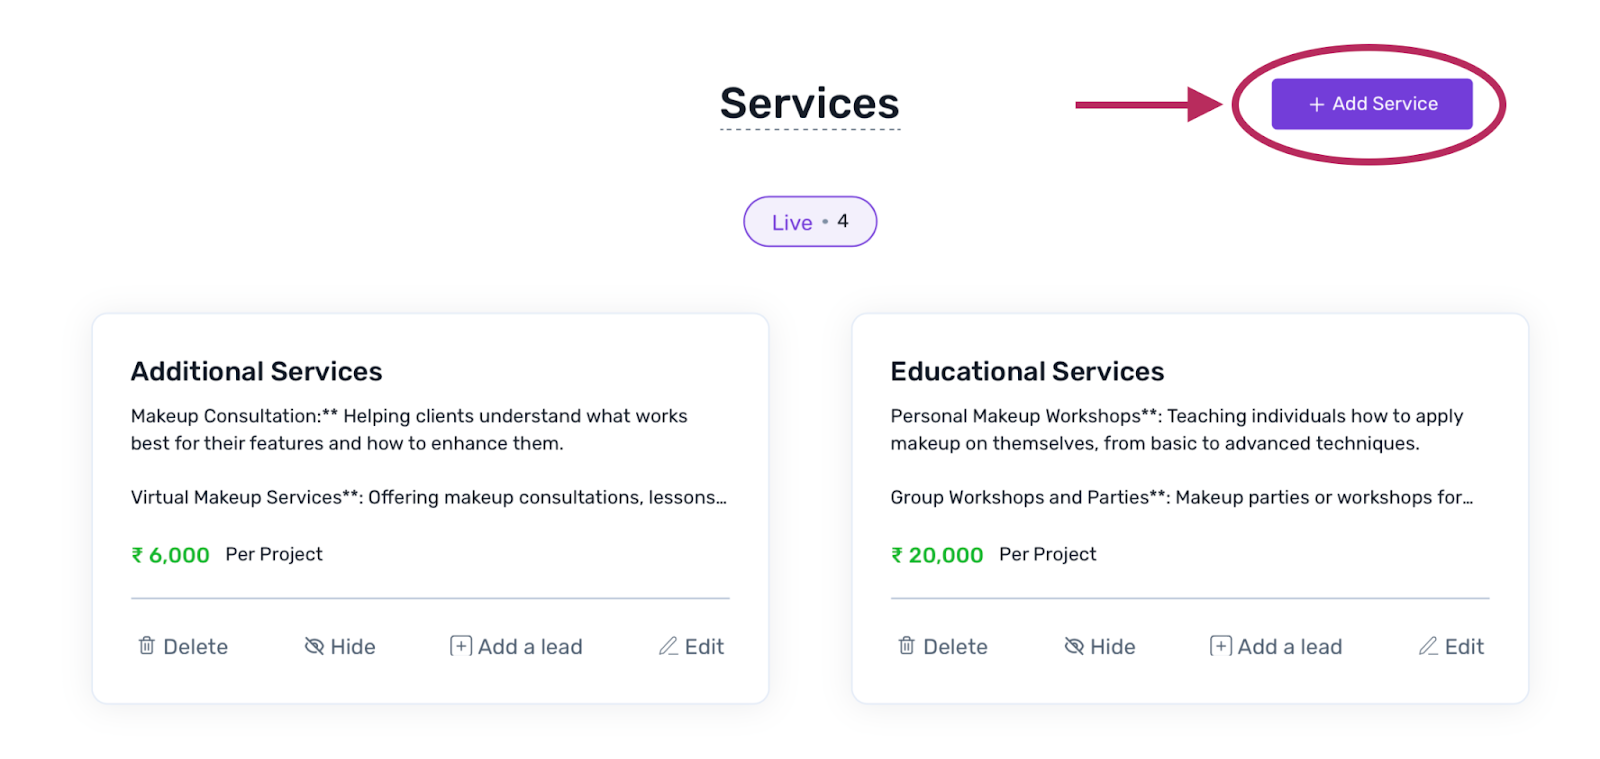
This will open a new page where you can add your service & pricing details. Let’s see how:
4.2) Add Service Details
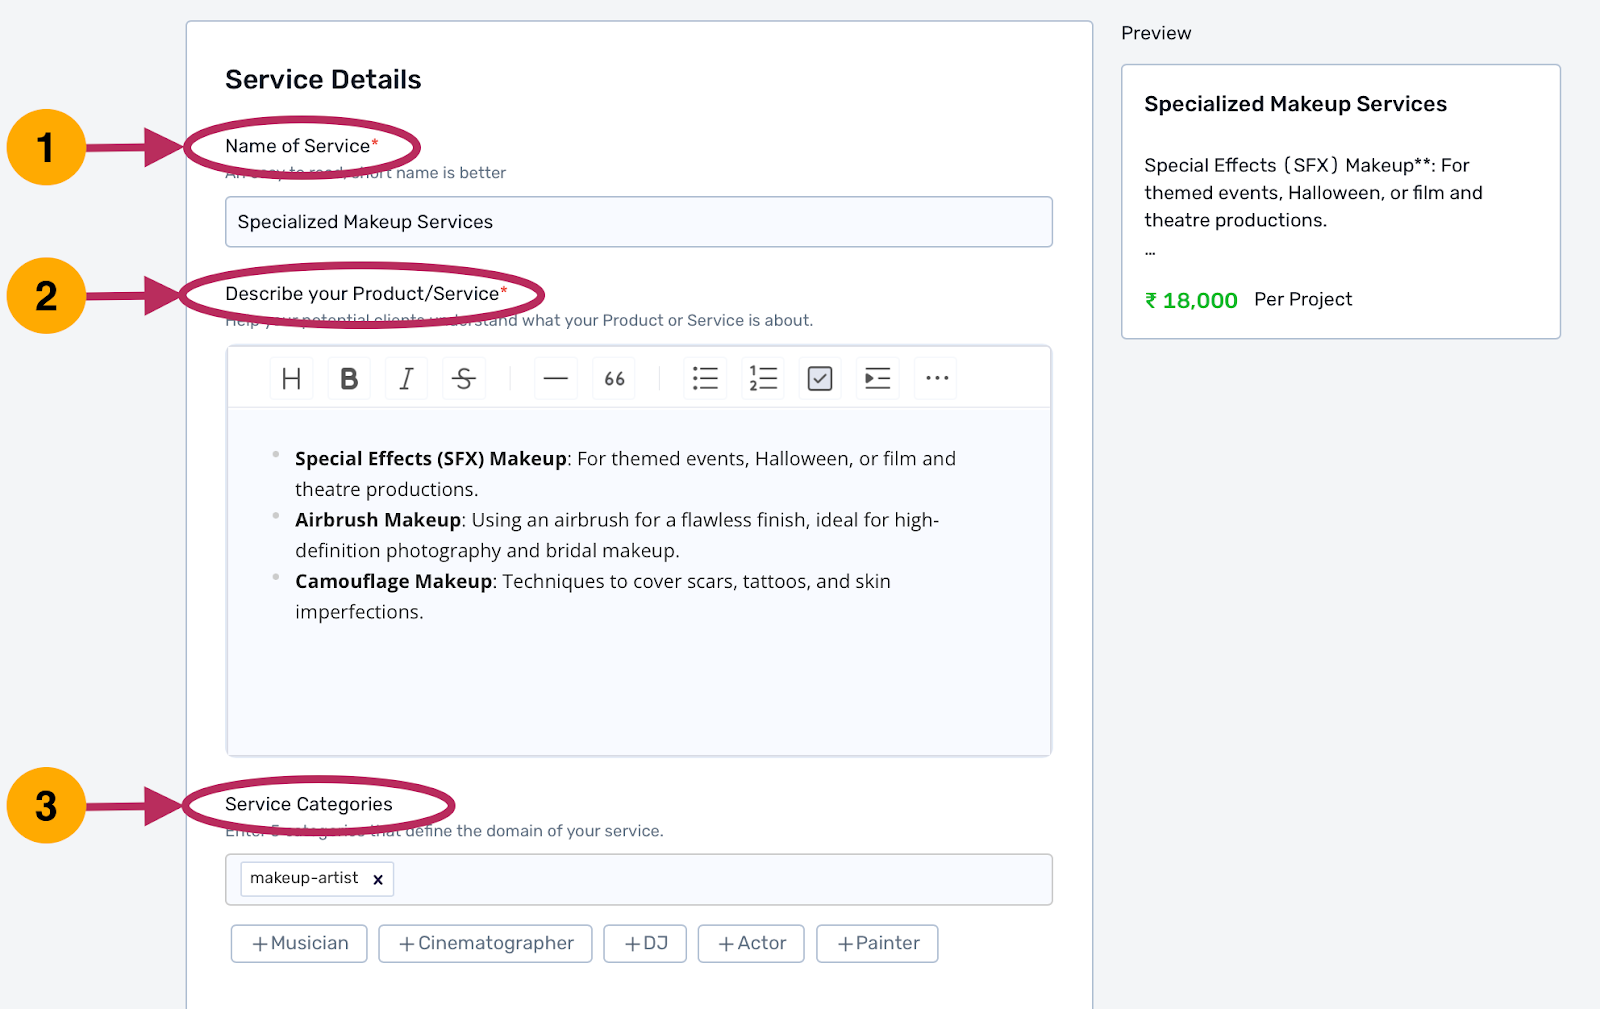
- Name of service: Add the name of the product/service.
- Describe your product/service: Here you can give the basic information about the Product/Service like:
Who is it for?
How it works.
Key benefits and what they can expect.
How it is different from competitors.
- Service categories: Adding the product/service category helps your business profile get more visibility on Google.
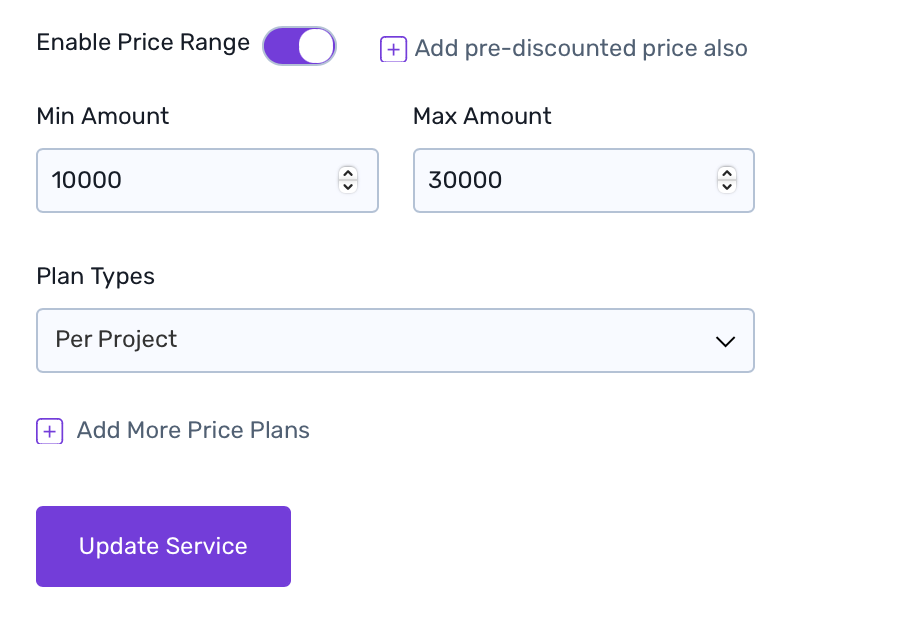
4.3) Add Pricing Details
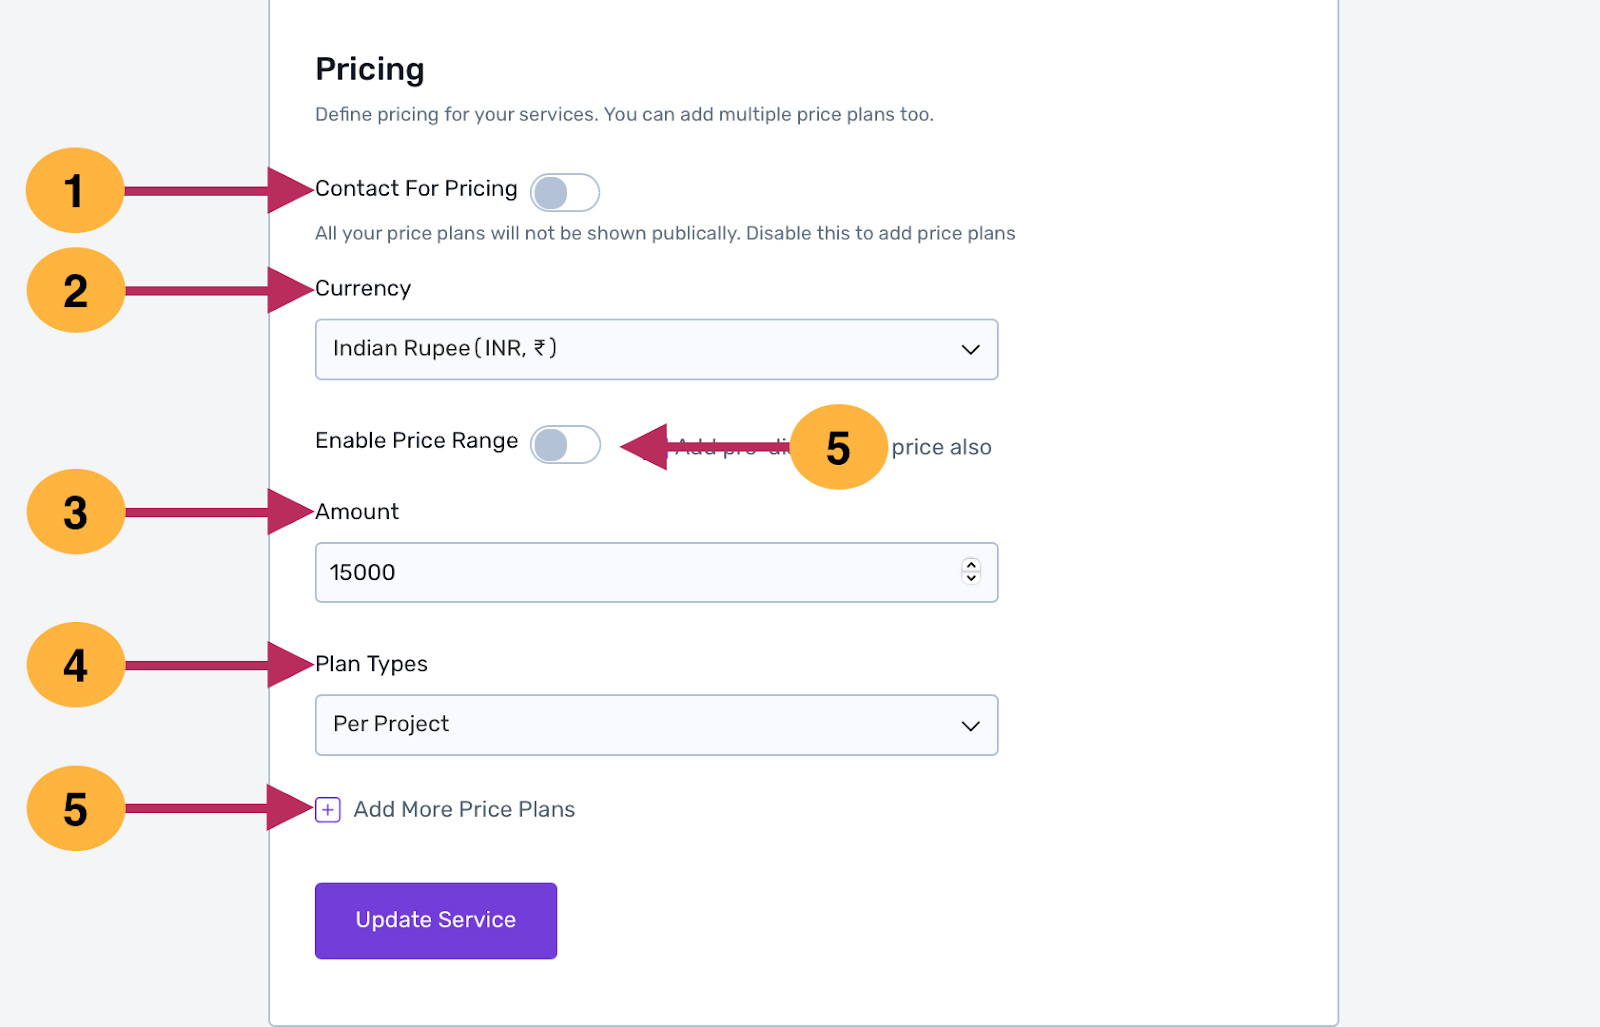
- Contact for pricing: If you don’t want to display the prices on your business profile you can switch ON the toggle. The interested leads will contact you directly for price details.
- Currency: Select the currency of your country
. - Amount: If you wish to display the price on your business profile, mention the specific amount of your service/product
- Plan types: You can choose Plan types, according to which you charge, as the price you charge can be per project hour, or day selected accordingly.
- Add more price plans: If you have more price plans, you can add them from here.
- Enable Price Range: If you don’t wish to mention a specific amount, you can also mention the price range of your product/service.

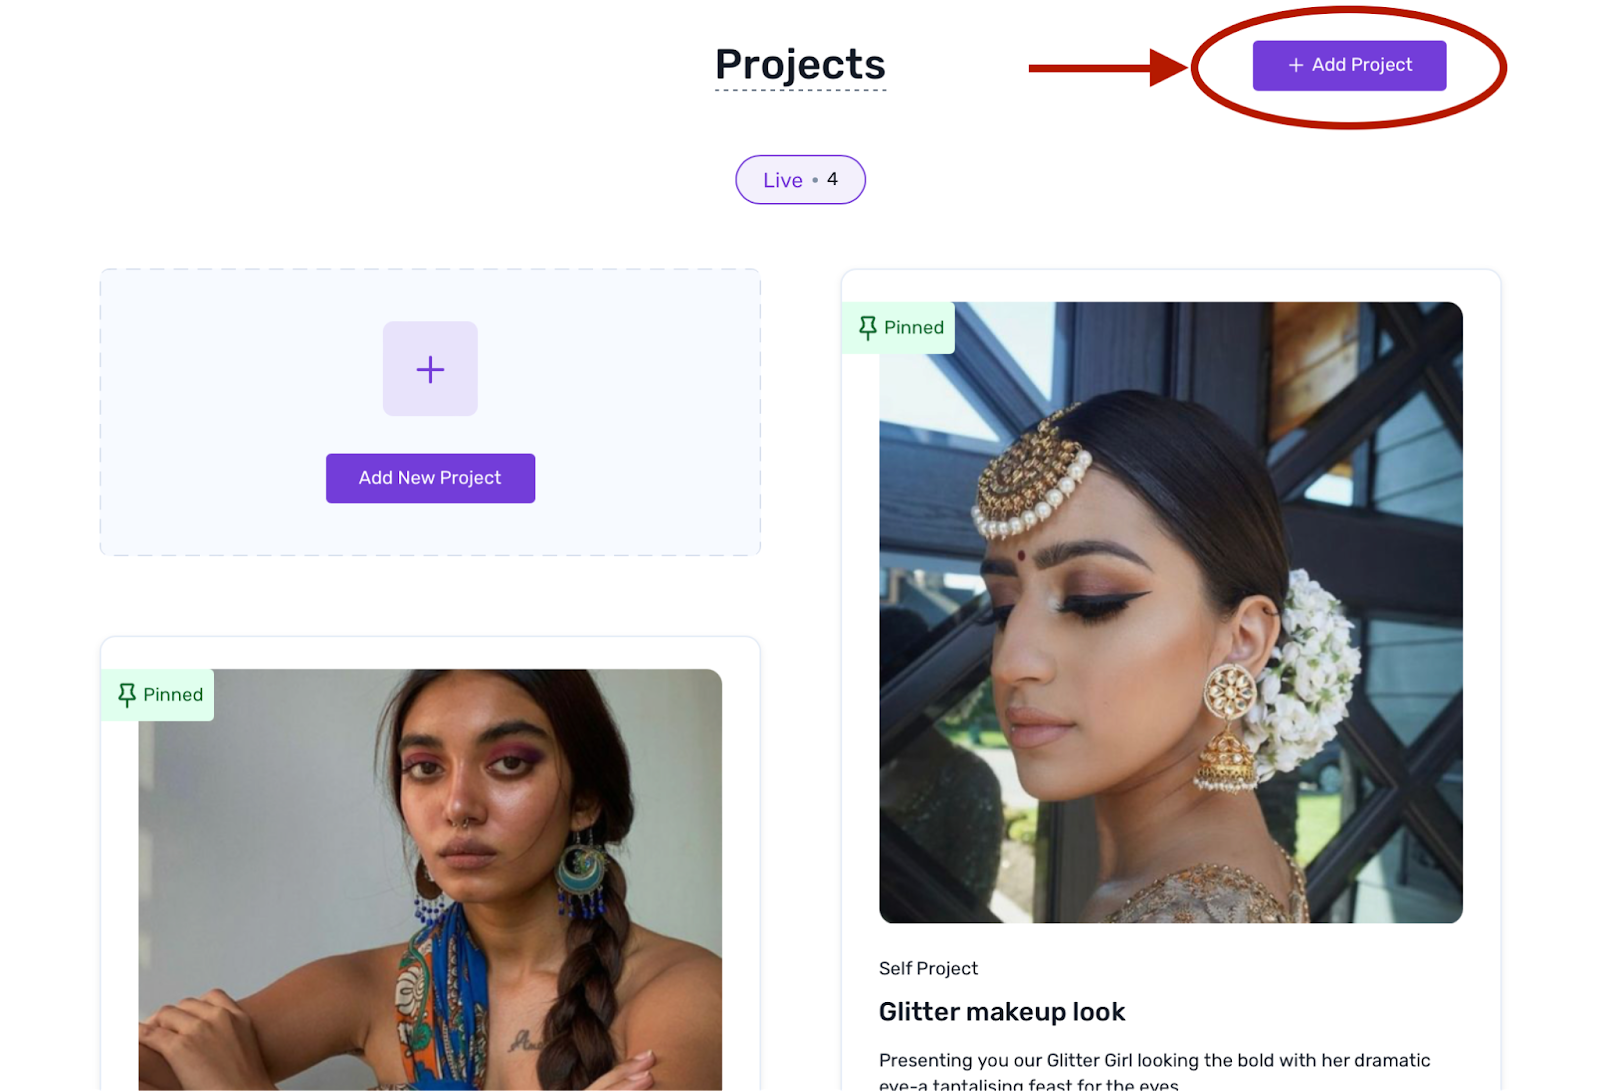
Step 5: Add Projects
Adding your past projects to your business profile can help you showcase the type of work you do and the quality of your work, which can help in decision-making for your potential leads.
Click on the “Add Project” button as highlighted below to get started:
You will see the following page where add the project details.
Let's take a look at all the fields one by one.
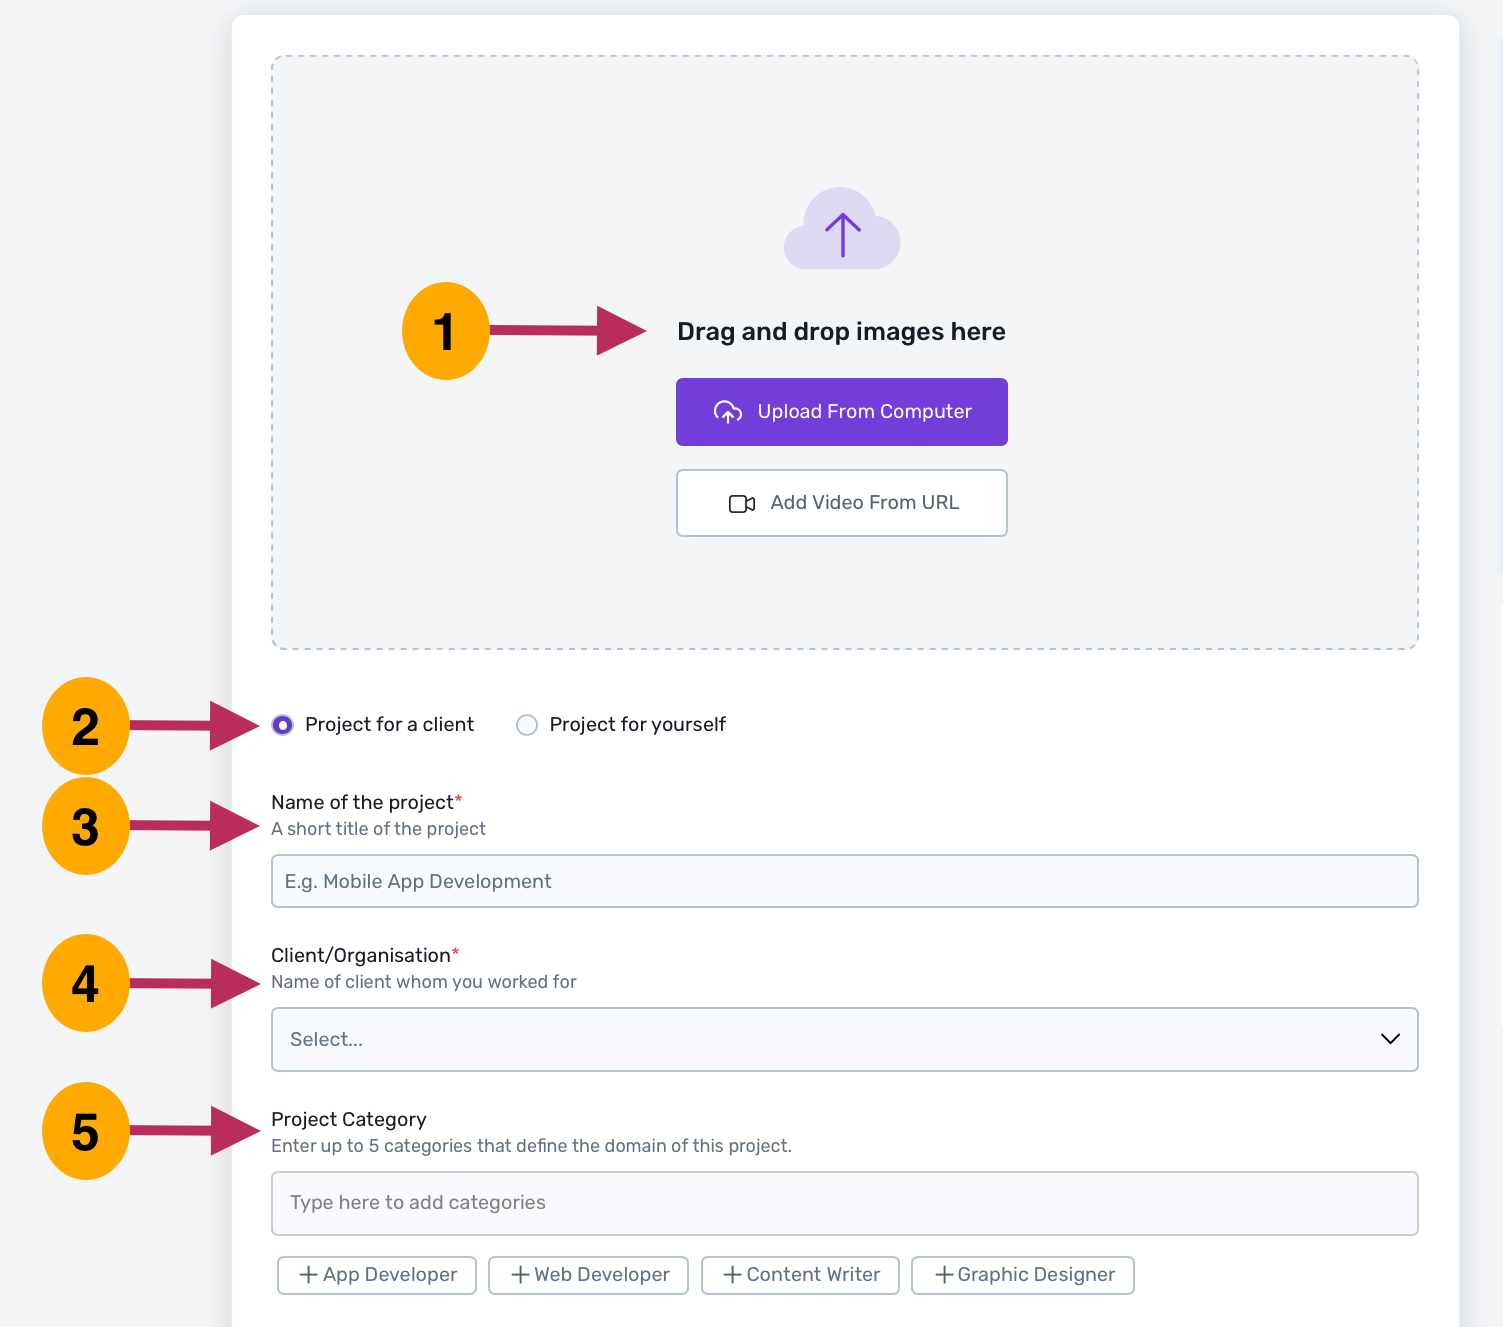

Add photos/videos: Here you can add multiple images or a video to showcase the work you did for your project.
Project for client/yourself: Choose whether the project you did was for yourself or a client.
Add the name of the project
Client/Organization: Select the client for whom you did the project from the dropdown or add a new client.

Project Category: Add the project category to increase the visibility of your business profile in Google search results.
Project Description: Provide a few details about your project like:
About the client
Client’s requirements and expectations
Brief description of the work you have done
Completion date: Add the date on which you completed the project. If you are still working on the project, select “Ongoing Project”.
Add project collaborator: If you have done the project in collaboration with someone, you can add them as a collaborator from here.

Add project budget: Mention the budget of the project to give the idea about your pricing to the leads. And if you don’t want to display the budget on your business profile you can click on “Don’t show budget on project.”

Add external links: Here you can add links to show more details about your project. For example -
If you are a website designer, you can add the link to the website you worked on.
If you are a content creator, you can add the link to a social media post here.
.

Link your services: We recommend you add relevant services to each of your projects. If a potential client likes your project, they can directly view your services & pricing from the linked service section.

Verify project link: Getting your project verified by your client would make you look more trustworthy. Just click on “Verify project from client” and add the contact details of the client as shown below.

Once you click on “Publish Project”, we will email your client to verify the project’s authenticity. The email will look like this:
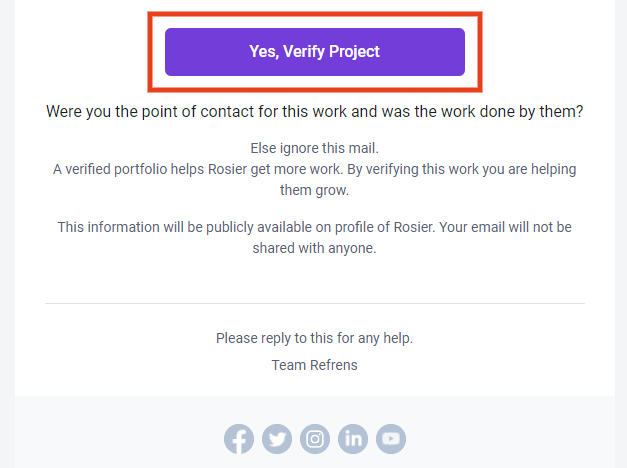
Your client can just click on “Yes, Verify Project”, to verify the project.
Once your project has been verified, it will get a green verification badge with verification details as shown below.

We recommend doing this for all of your projects as green badges will make your projects look more authentic & trustworthy!
Step 6: About Us
Briefly introduce the company, including -
Its name, when it was founded, and its mission.
Mention what the company does and the core products or services it offers.
Introduce your team or key members.
Clearly explain what sets you apart from competitors. This is crucial for making your company memorable and attractive to potential clients.
Add links to your website, social media profiles, and other platforms to give more information about your business.

Step 7: Customize Layout
You can customize the layout of your profile according to your preference. Just click on “Customize Layout” on the edit profile page to get started.
You will see the following menu to customize the layout.

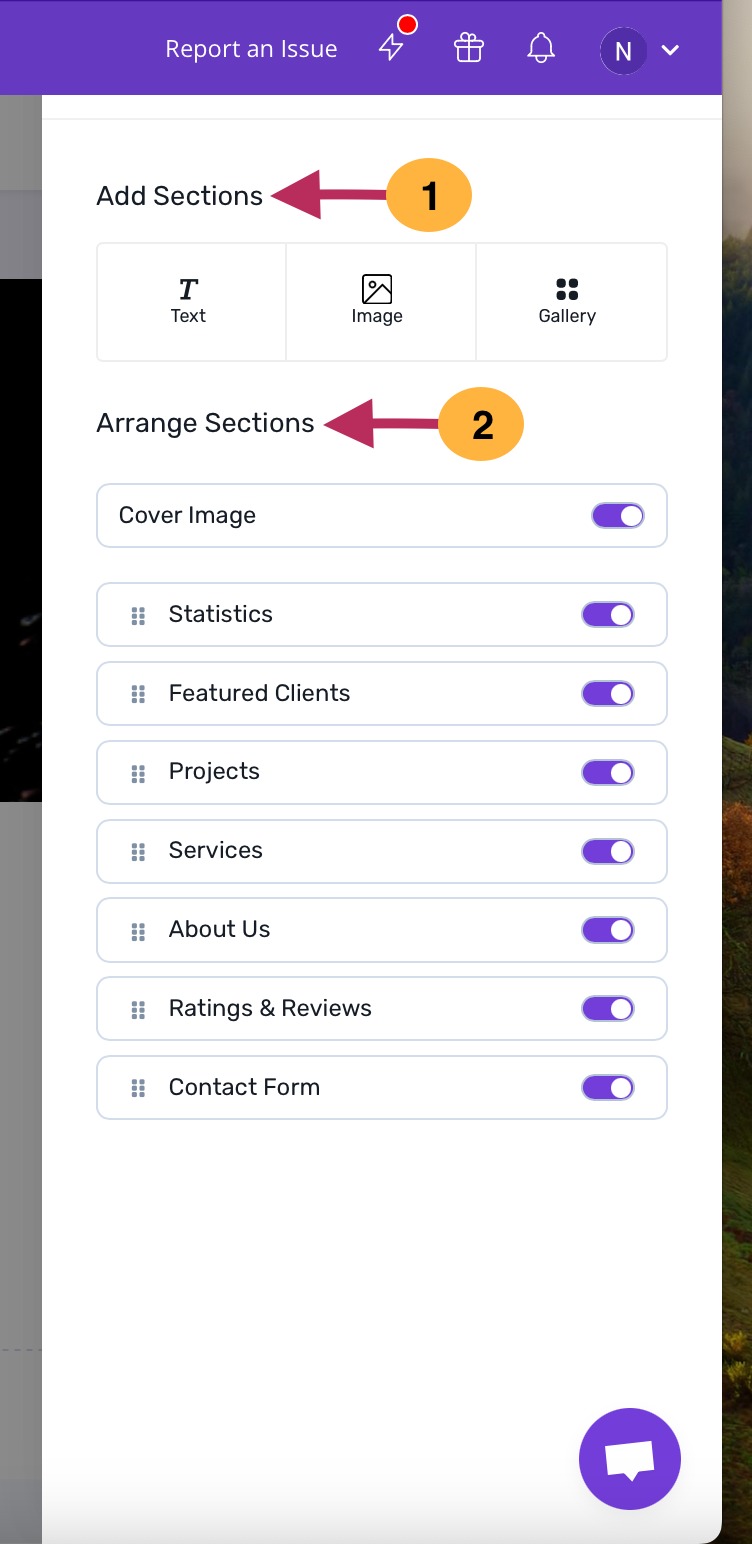
Add Sections: If you want to add more information to your profile in the form of text, images, or a gallery of images, you can do that from here.
Arrange/hide Sections: If you want to change the ordering of the sections, you can do that from here. You can also show/hide a section by turning the toggle on/off.
That's it! you can now start creating your business profile on Refrens to improve your online presence!